


How to upload videos to Jira after Cypress test run
A simple step-by-step tutorial with code examples


Preface
It's easy to integrate Cypress with Jira using the API. Once, you're done with this tutorial, you will be able to attach videos to Jira tasks programmatically from within your Cypress test suite.
Prerequisites
Existing Jira platform
Basic knowledge of JavaScript and Cypress framework
Basic knowledge of how to use the API
Practical knowledge of using Terminal (or similar tools like Windows' Powershell)
Getting started with a new Cypress project
First of all, let's initialize a new project. To do that, let's create the simplest project with the npm.
Step 1: Create a new directory for our Cypress project
Step 2: From the new directory, execute the npm init command within the Terminal to create a new npm-based project. This step will create a package.json file.
Step 3: From the root directory (the same as in Step 2), from the root directory the npm install cypress --save-dev command can be used to add Cypress to the project's dependencies.
Step 4: Run Cypress open command. There are two ways (at least) to do so:
Use
cypress open -e2e -b chromecommand from the root directoryAdd
"test": "cypress open --e2e -b chrome"to thescriptssection of thepackage.jsonfile and run the script withnpm run testcommand from the root directory
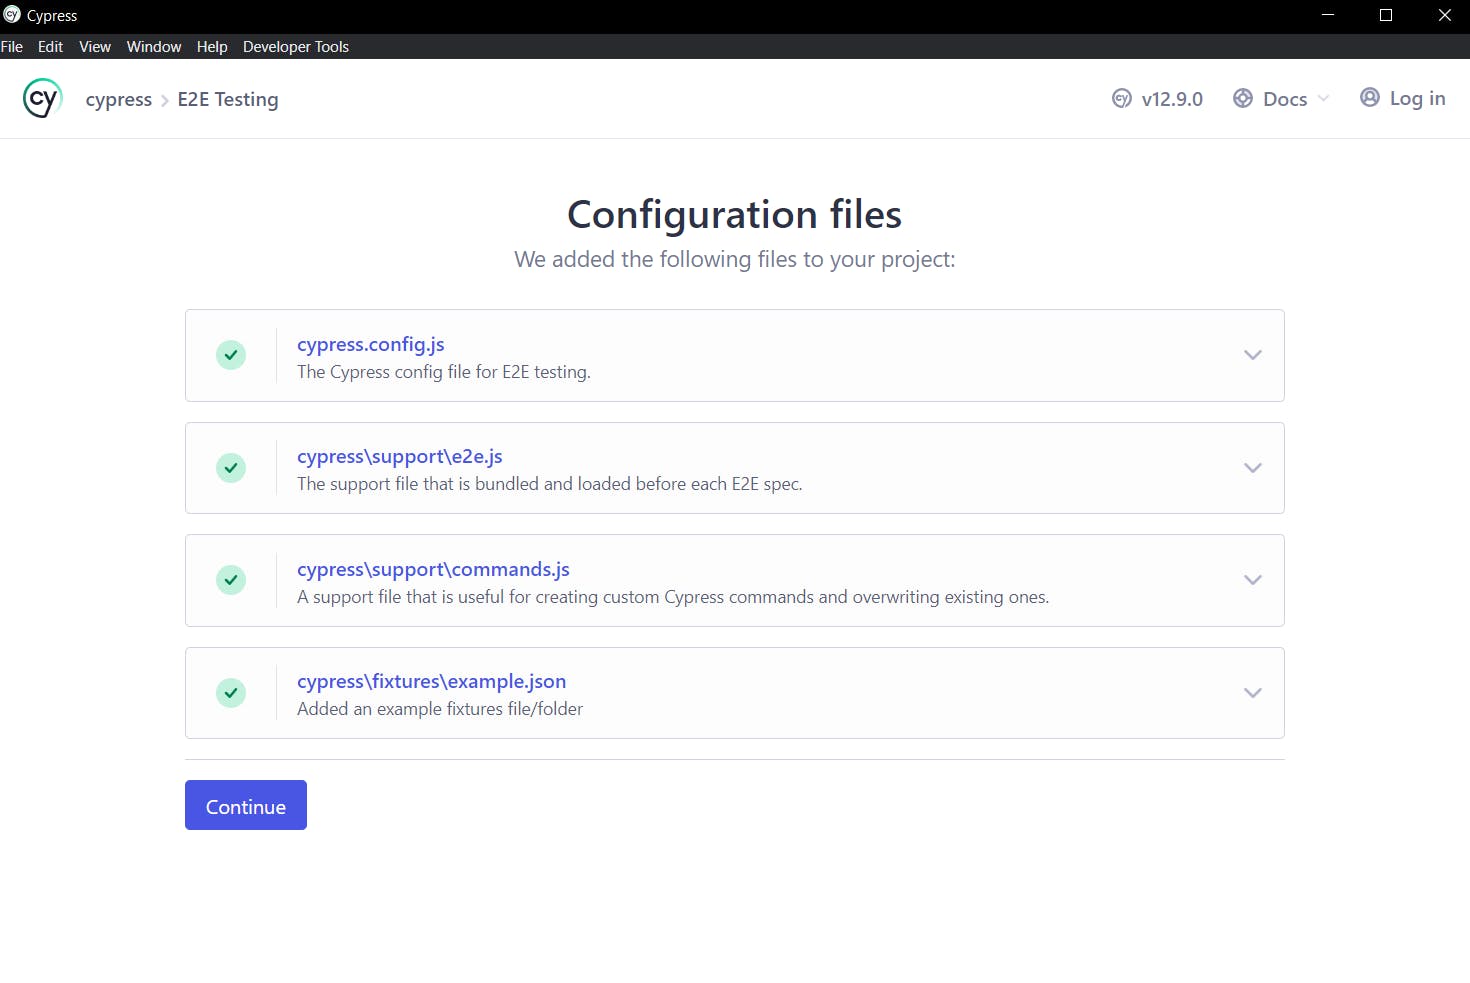
Step 5: Below you can find a picture of what you should see shortly after running the command within the Terminal. Press the continue button and select the Scaffold example specs to create some example test files. To make sure that everything is working as expected execute one of the available spec files (e.g., todo from 1-getting-started directory)
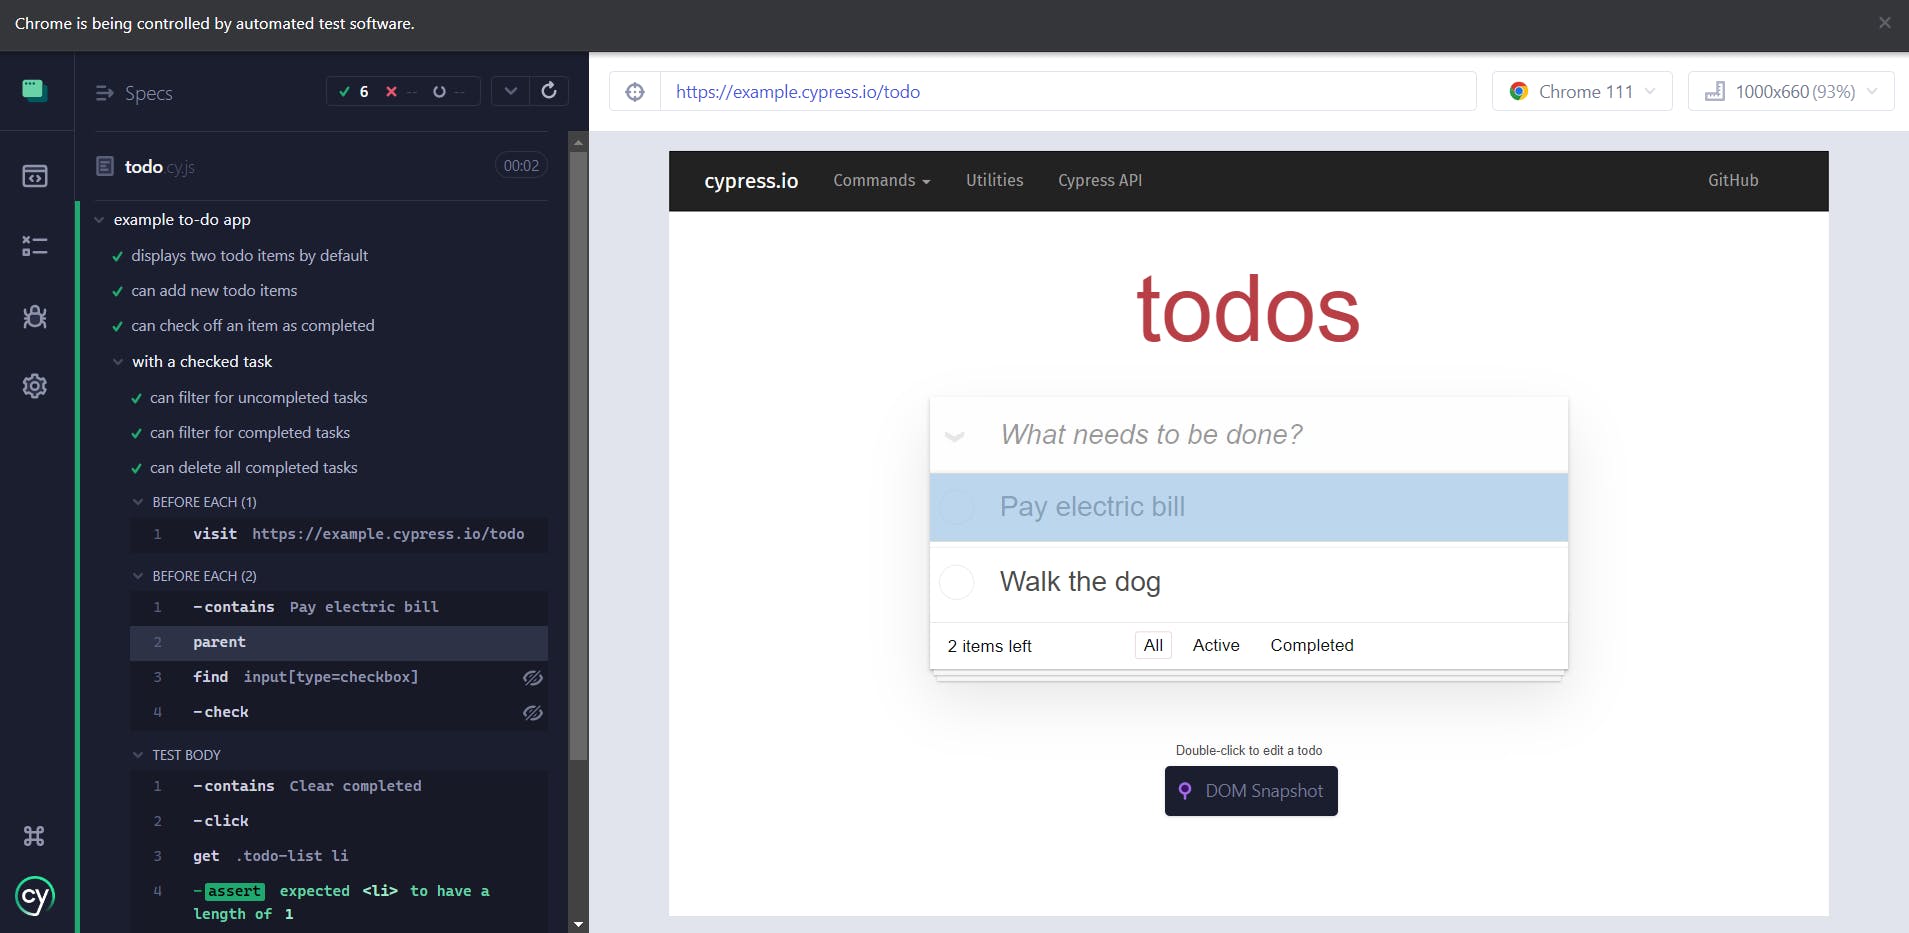
Step 6: Tests should pass and thus end up with green arrows, as in the illustration below.
Recording videos with Cypress
As you could've already noticed Cypress doesn't record videos when running via Cypress Runner (cypress open command). I couldn't find precise information on why is that exactly, so I have to assume it's related to the Cypress architecture when running in the so-called headed mode (contrary to the headless mode).
On the other hand, video recording is automatically done when running Cypress via cypress run command. Let's fix our scripts section of the package.json, shall we?
"scripts": {
    "cy-open": "cypress open --e2e -b chrome",
    "cy-run": "cypress run --e2e -b chrome --spec cypress/e2e/1-getting-started/todo.cy.js"
},
With --spec flag we're able to specify a single spec file that we want to be executed. The next step is to verify that videos are being recorded. Run the npm run cy-run command from the root directory.
Once, the test is finished you should end up with a brand-new directory named videos which should contain a video file named like the spec file with the *.mp4 suffix (e.g., todo.cy.js.mp4).
Cypress videos upload to Jira
For the sake of simplicity, let's try out the simplest solution for the video upload.
Jira Personal Access Token & Base URL
First of all, we need to provide our Cypress tests with access to Jira. To do that, we can utilize built-in Jira's personal access token functionality.
Log in to your Jira platform, and click on your profile icon. Select the "Profile" option and go to the Personal Access Tokens tab from the side nav.
Press the Create token button, provide the title and save the token somewhere safe. Once, we got the token, let's extract the Jira platform base URL as well.
With both of these values, we can create environment variables within cypress.config.js file:
module.exports = defineConfig({
  e2e: {
    env: {
      jiraApiToken: 'yourJiraApiToken',
      jiraApiBaseUrl: 'https://yourJiraPlatformBaseUrl/rest/api/2',
    }
Cypress videos overview
Now, let's focus on how Cypress works when it comes to video recording.
Cypress records videos of the entire spec file (not per test case)
Cypress records are compressed by default. To change that, we can add the
videoCompression: falseflag within thecypress.config.jsfile (like in the example below). The video compression flag accepts values: false and numerical values from the range 0-51.e2e: { videoCompression: false, // either false, or values from 0 to 51 env: { jiraApiToken: 'yourJiraApiToken', jiraApiBaseUrl: 'https://yourJiraPlatformBaseUrl/rest/api/2' }Cypress clears the videos directory before a
cypress run. You can change it by adding a flagtrashAssetsBeforeRuns: falsewithin thecypress.config.jsfile (e2e section)We can only utilize the
after:specCypress' event to gain control over what's happening with the video file
With ground rules established, we can proceed with the coding.
The package.json required dependencies
We need to update our package.json file to enable us with the possibility to upload files via API. To do that, add two required dependencies, like shown below:
"dependencies": {
    "form-data": "^4.0.0",
    "node-fetch": "^2.6.7"
}
form-data is an interface to provide a key/value format to form fields and their respective values, which can be then sent via fetch().
node-fetch is a package that provides the window.fetch() to the Node.js environment. You can learn more here: https://www.npmjs.com/package/node-fetch
Please do consider the dependencies versions, when you'll be implementing this code into your Cypress-based framework, as you may encounter some difficulties if you modify those values. It's not forbidden - just make sure that you know what you're doing :)
Code implementation
With everything prepared, what's left is to update our cypress.config.js file with the appropriate code.
const {defineConfig} = require("cypress");
const path = require("path");
const fs = require("fs");
const FormData = require('form-data');
const fetch = require('node-fetch');

module.exports = defineConfig({
  e2e: {
    videoCompression: false,
    env: {
      jiraApiToken: 'yourJiraApiToken',
      jiraApiBaseUrl: 'https://yourJiraPlatformBaseUrl/rest/api/2'
    },

    setupNodeEvents(on, config) {
      on('after:spec', async spec => {
        const videoPath = path.normalize(`${config.videosFolder}/${spec.baseName}.mp4`);

        if (fs.existsSync(videoPath)) {
          const form = new FormData();
          form.append('file', fs.createReadStream(videoPath));

          const requestDetails = {
            method: 'POST',
            headers: {
              'Authorization': `Bearer ${config.env.jiraApiToken}`,
              'Accept': 'application/json',
              'X-Atlassian-Token': 'no-check',
              'Content-Type': `multipart/form-data; boundary=${form._boundary}`
            },
            body: form
          }

          await fetch(`${config.env.jiraApiBaseUrl}/issue/COPQMS-570/attachments`, requestDetails)
            .then(response => {
              if (response.status !== 200) {
                console.log('Server sent wrong status. Status: ' + response.status)
              } else {
                console.log(`Added video as evidence: ${videoPath}`);
              }
            })
            .catch(err => {
              console.error(`Video (${videoPath}) couldn't be uploaded due to an error`);
              console.error(err);
            });
        } else {
          console.error(`Video file not found: ${videoPath}`);
        }
      })
    },
  },
});
Let's break it down:
setupNodeEvents(on, config) - is a default Cypress config settings function, that allows us to modify the internal Cypress behaviors (learn more here)
on('after:spec', async spec => { - we're using the Cypress' after:spec hook, to perform video upload once the test run based on the spec file is done
const videoPath = path.normalize(`${config.videosFolder}/${spec.baseName}.mp4`); - this line is responsible for video file path normalization (to put it simply - we want the path to be compatible with different file systems)
if (fs.existsSync(videoPath)) {
          const form = new FormData();
          form.append('file', fs.createReadStream(videoPath));

          const requestDetails = {
            method: 'POST',
            headers: {
              'Authorization': `Bearer ${config.env.jiraApiToken}`,
              'Accept': 'application/json',
              'X-Atlassian-Token': 'no-check',
              'Content-Type': `multipart/form-data; boundary=${form._boundary}`
            },
            body: form
          }
The code above does a couple of things:
if (fs.existsSync(videoPath)) {- checks if the video file exists. If not - then an error is displayed in the console with information that the video file couldn't be foundconst form = new FormData(); form.append('file', fs.createReadStream(videoPath));- creates a new FormData and appends the video file as aReadStream. This enables us to send the binary files over the APIEntire section related to
requestDetailscontains API request details. The most important things in terms of Jira integration are:'Authorization': Bearer ${config.env.jiraApiToken}- we're using the Jira's Personal Access Token'X-Atlassian-Token': 'no-check'- this is the required header (mentioned here)'Content-Type': multipart/form-data; boundary=${form._boundary}- we need to specify the Content-Type. Otherwise, the 415 Unsupported Media Type error will occur. Also, theboundaryis required, unless you want to see the 500 Internal Server Error
body: form- we're passing the FormData with the appended file as an API request body
await fetch(`${config.env.jiraApiBaseUrl}/issue/COPQMS-570/attachments`, requestDetails) - The last part is implemented to perform the API request. We're using the hardcoded value of the Jira ticket (COPQMS-570), but feel free to tinker around it (e.g., add an automatic Jira ticket based on the Test Plan/Run/Execution).
Also, notice the await next to fetch() function. Without it, Cypress will just go with the flow and skip the file upload part entirely.
After fetching the response, we're performing simple validations based on the response status code and availability of the resources provided to the fetch() function.
Testing the solution
Let's try out the code. Run the npm run cy-run command from the root directory and check the Jira ticket afterward.
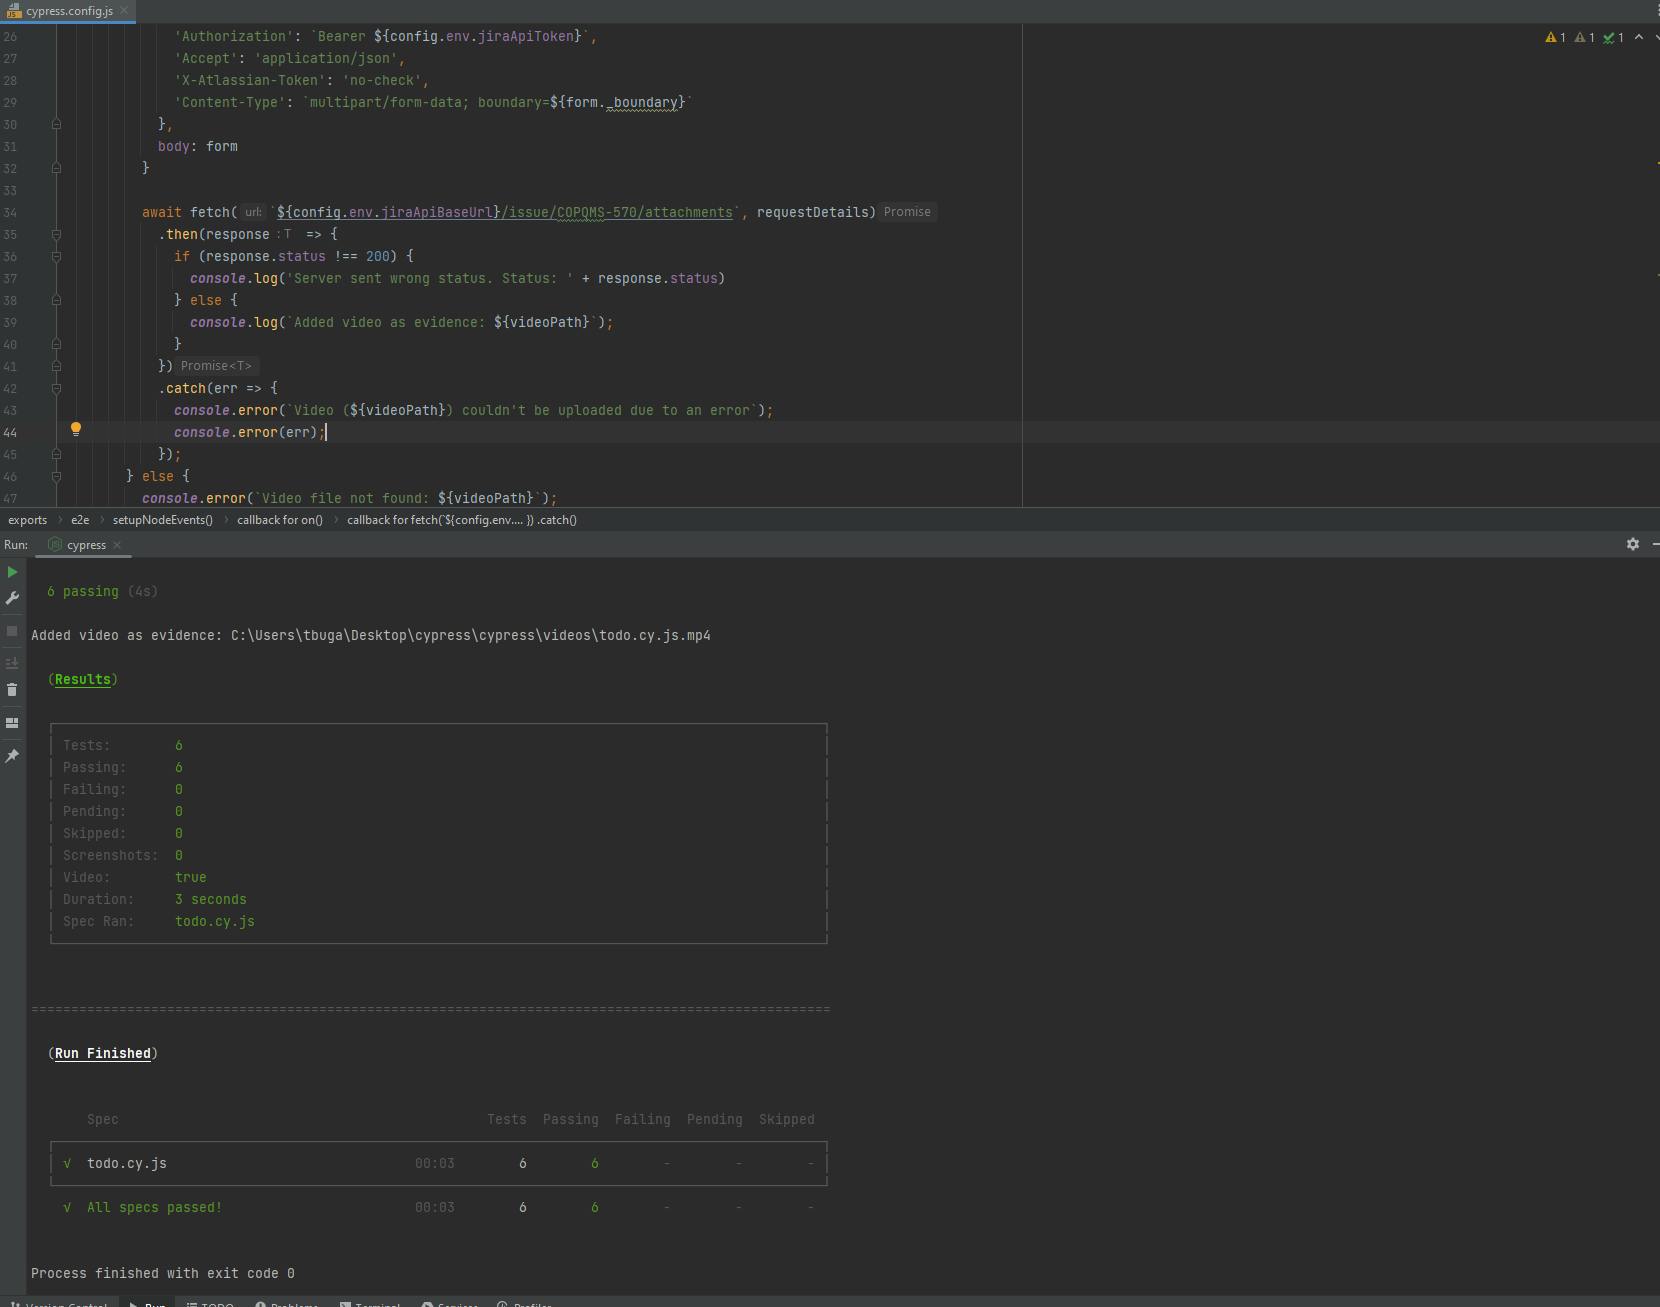
As you can see my test passed with flying colors and there is a log that states that the video file has been uploaded.
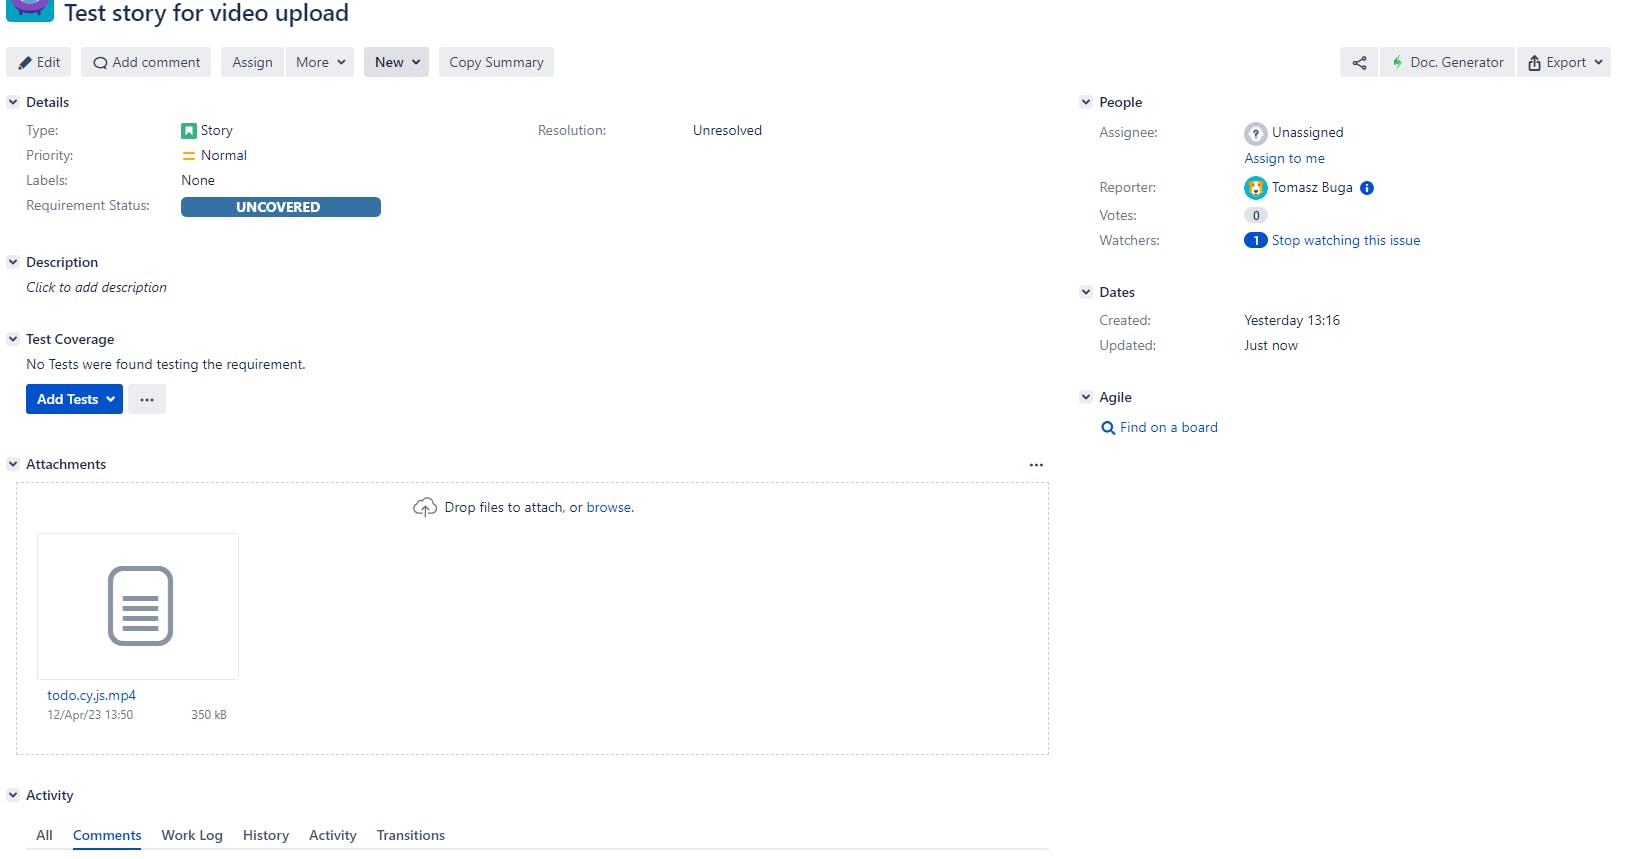
We can also confirm from the Jira platform that the attachment is added to the ticket.
If you have any questions - feel free to leave them in the comments section.
Happy coding!